Integrating Contact Form 7 with Form Vibes
This guide explains how Form Vibes integrates with Contact Form 7 and how you can capture and manage Contact Form 7 submissions in your WordPress dashboard.
By default, Contact Form 7 sends submitted form data via email but does not store submissions in the WordPress database. When Form Vibes is installed, it automatically captures Contact Form 7 submissions and saves them in the database, allowing you to view and manage entries from a centralized interface.
To integrate Contact Form 7 with Form Vibes, follow the below steps.
Install and Activate Required Plugins
Before capturing submissions, make sure Form Vibes and Contact Form 7 plugins are installed and activated on your website
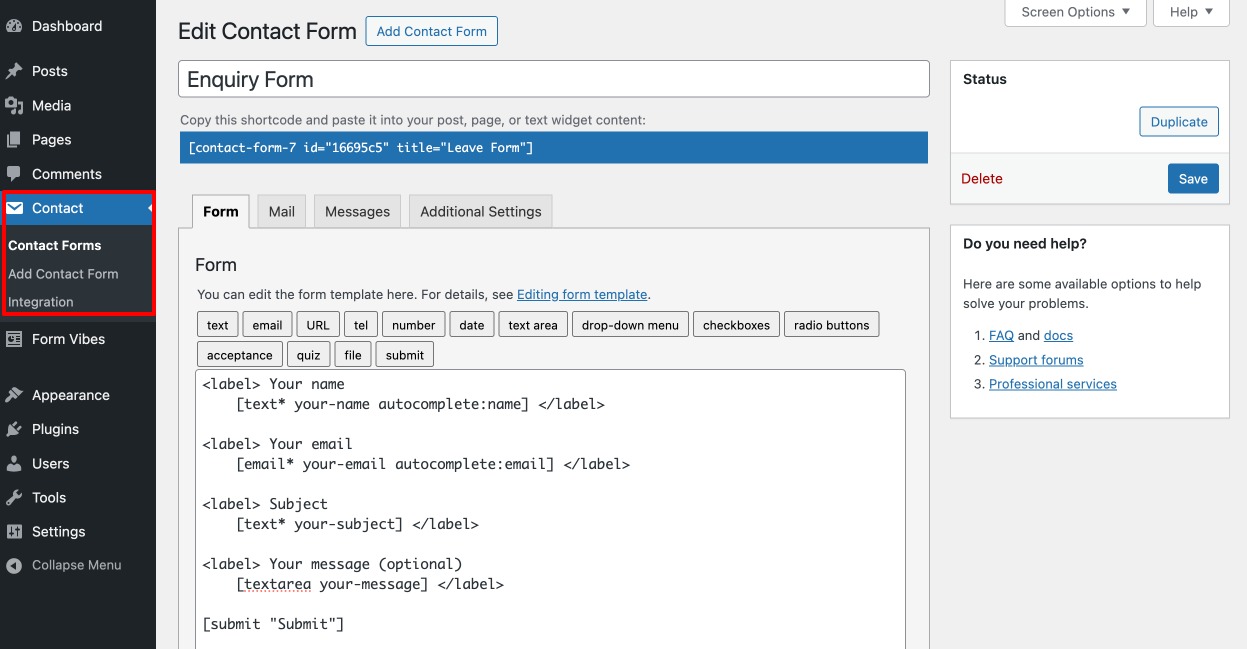
Create a New Form
After installing the plugins, create a form using Contact Form 7.
- Navigate to Contact → Contact Forms
- Click Add New
- Add the required form fields
- Save the form
- Add the form to a page using the provided shortcode
Once the form is published, visitors can submit entries from the frontend.
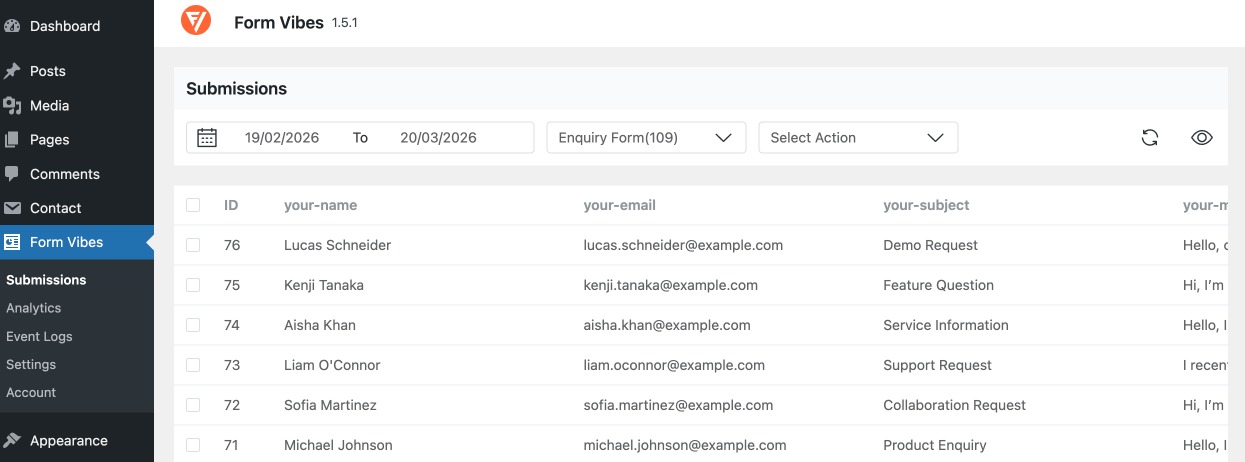
Viewing Contact Form 7 Submissions
After a visitor submits the form, Form Vibes captures the submission automatically.
To view the stored entries:
- Go to Form Vibes → Submissions
- Select your Contact Form 7 form from the dropdown menu
All captured entries will appear in a tabular format, making it easy to review and manage submission data.
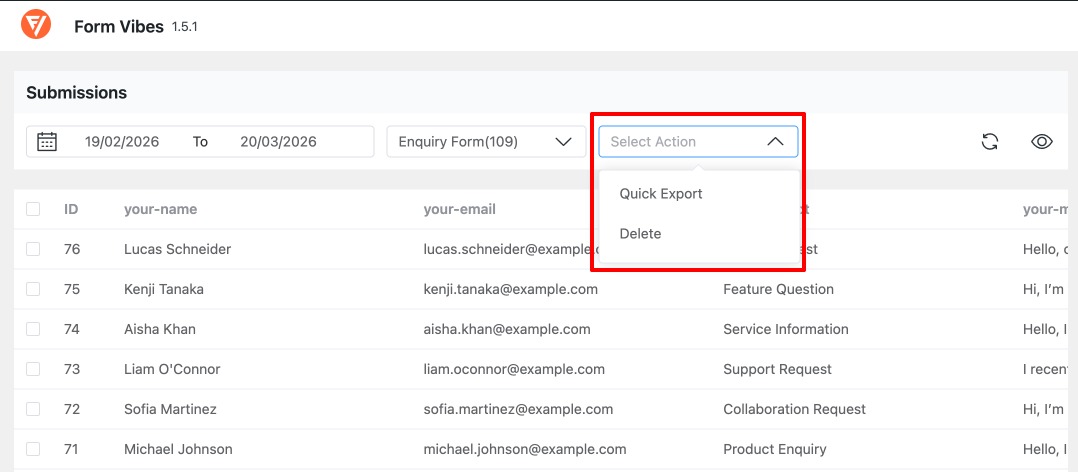
Managing Contact Form 7 Submissions
Form Vibes provides several tools to help you manage captured submissions.
You can:
- Filter submissions using date range presets
- Export entries when needed
- Change submission status
- Analyze form performance, and more.
These features help organize and manage form data more efficiently.
How Contact Form 7 Works with Form Vibes
Once both plugins are installed and activated:
- A visitor submits a Contact Form 7 form.
- Contact Form 7 processes the submission.
- Form Vibes captures the submitted data.
- The submission is saved in the WordPress database.
- The entry becomes available in the Form Vibes -> Submissions.
No additional configuration is required to enable this integration.